Tool to create presentation slides that can be exported as PDF.
Content and appearance of slides is defined in a simple text format, similar to LaTeX. This text is then converted into a set of slides. Additionally, elements’ position and size can be interactively adjusted with the mouse.
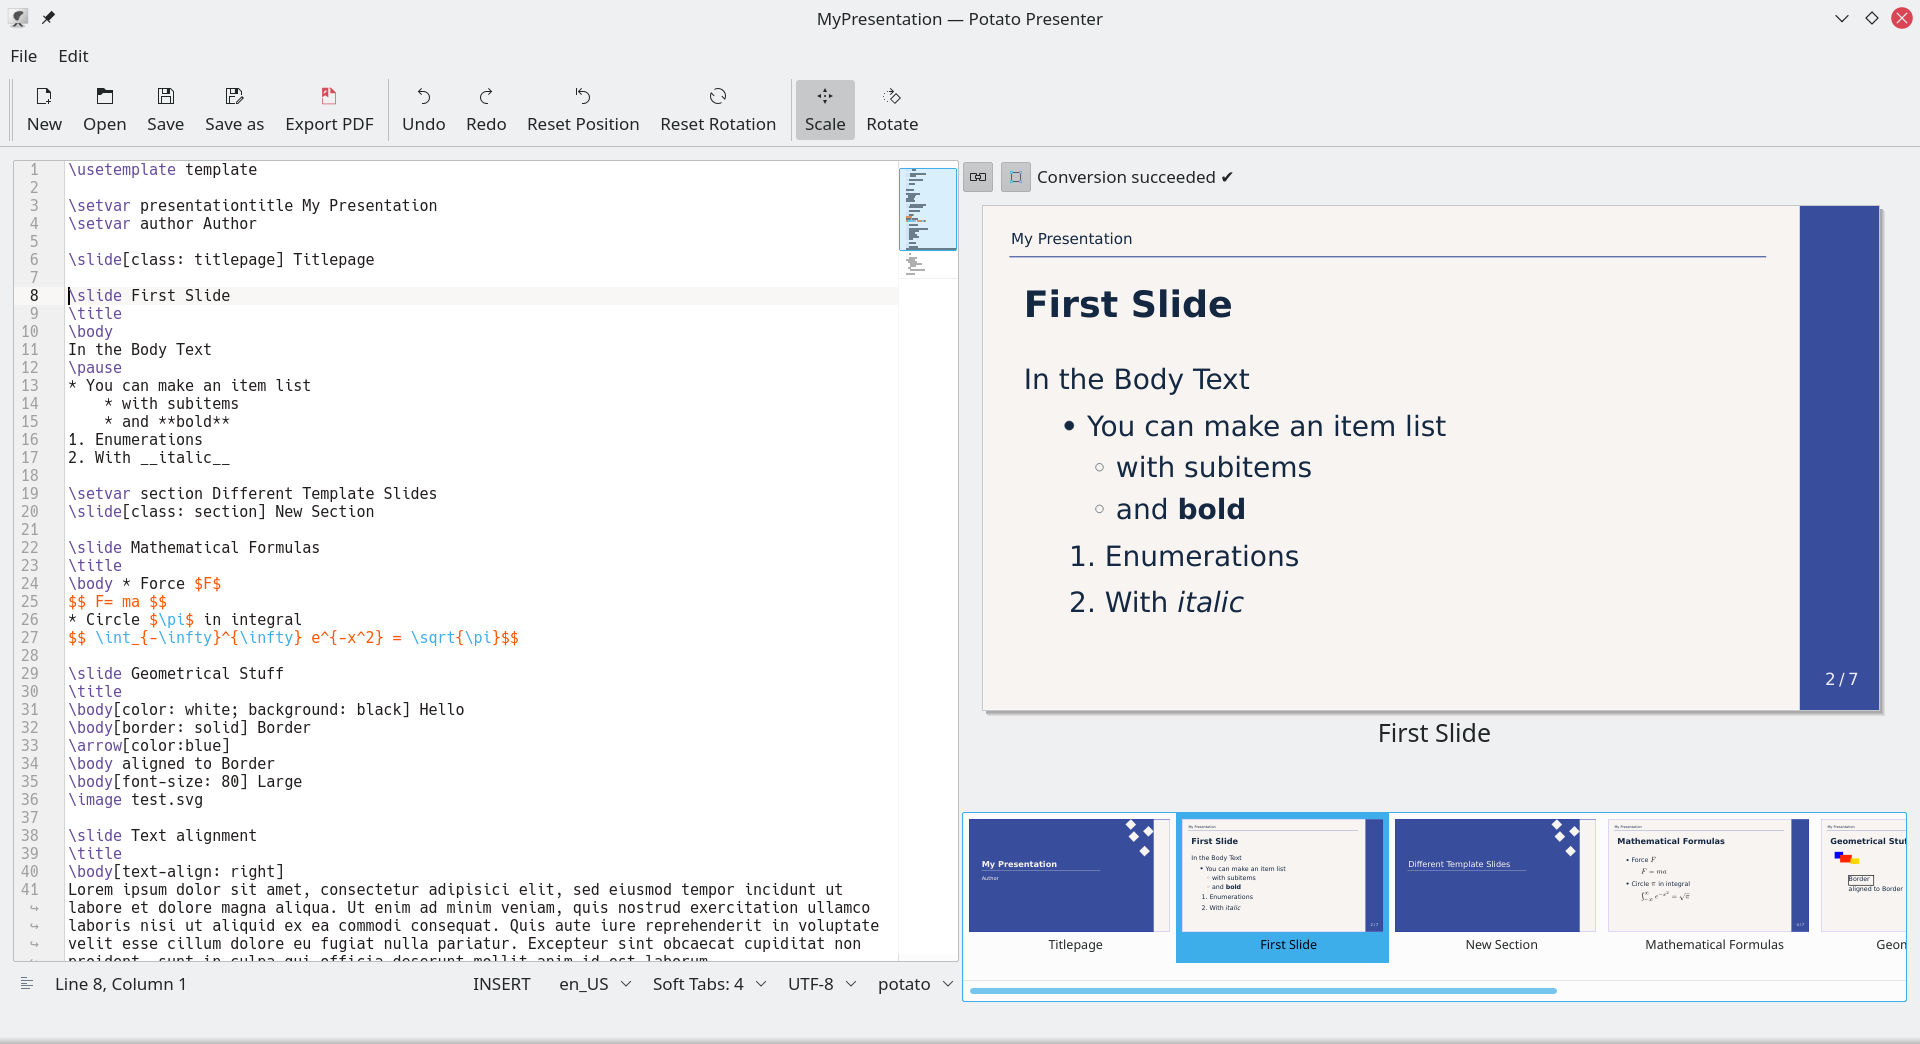
Type your input into the editor on the left side. A preview is shown immediately on the right.
Commands always starts with a “\”.
Create a new Slide with \slide title.
Create a title on your slide with \title.
Create a text with \body text.
Create an image with \image path_to_image.
You can move, rotate and scale your elements with the mouse on the panel on the right side.
When you are finished, click “Export PDF” to export your presentation as PDF and present it with your PDF Viewer.
If you save the document, a second file (JSON) is generated containing the elements’ positions.
Text elements supports some markdown features like:
Type **Bold** to get Bold.
Type __italic__ to get italic.
Type * at the start of the line to get a itemize list.
Type a number with a point at the start of the line to get an enumeration list.
Type $\pi$ to get a formula showing a Pi.
Type $$\pi$$ to get a formula in the next line.
| Commands | Functionality |
|---|---|
\slide |
Creates a new Slide. |
\text |
Creates a new text element. |
\title |
Same as \text[class: title] (see below). |
\body |
Same as \text[class: body] (see below). |
\image |
Creates an image from the given path. |
\code |
Creates a Code box with highlighting given by the argument language. |
\geometry |
Creates a shape, e.g. \geometry arrow. |
\latex |
The input is given to a LaTeX process and the outcome is shown as element. |
\setvar |
Sets a variable. |
\usetemplate |
Sets a template. |
\pause |
Generates an additional slide with only the content in front of the pause. (only in PDF) |
Behind commands and an optional property list (see behind) a text can be given.
For example, the text given behind \body is interpreted as markdown and is rendered on the slide preview. The text behind \image whereas is interpreted as a path to an image. If you do not write anything behind \title the slide id is taken as title of the page. Otherwise, the text behind \title is taken.
The text can be given directly without any signs. But in some cases the program will have problem to understand where the text starts and ends. For this you can use optional brackets \{ and \}, e.g.
\body \{Hello World!\}
On the right side of the application, a preview is generated. On this you can move and scale the objects. To rotate objects click on the Rotate button in the toolbar.
You can reset the elements position and rotation by selecting the element and then clicking on the buttons Reset Position or Reset Rotation.
You can snap elements in the center of the slide by moving them close to the center. Also, you can align an element to the top or left side of another element with the help of a snapping mechanism. To turn off the snapping feature, use the small button atop of the slide preview.
If you select an element on the slide preview the cursor in the editor jumps to the code created that element. Also, if you change the position of the cursor in the editor the selection at the slide preview will change. To turn off this behavior use the other small button atop the slide preview.
You can give arguments in square brackets after a commands that are similar to the CSS Properties:
e.g. \body[color: grey; text-align: right]
List of supported arguments:
| Argument | Functionality | Example Values |
|---|---|---|
| color | Color of font, arrow, line. | blue, #aa55ff |
| font-family | Font name. | Hack |
| font-size | Font-size. | 20 |
| text-align | Text alignment. | left, right, center, justify |
| line-height | Fraction of line height. | 1.5 |
| font-weight | Font weight. | bold, normal |
| opacity | Opacity of whole element. | 0.7 |
| background | Background color of element. | red, #aa55ff |
| background-color | Background color of element. | red, #aa55ff |
| border | Creates a border around the element. | 2px solid blue |
| left | Sets the position of the element left. | 100 |
| top | Sets the position of the element top. | 100 |
| width | Sets the position of the element width. | 100 |
| height | Sets the position of the element height. | 100 |
| angle | Sets the rotation angle in degree. | 180 |
| padding | Sets padding of a box. | 20 |
| border-radius | Sets the border-radius of the box. | 10 |
| marker | Sets the marker of the markdown. | red bold, #eee |
| language | Sets the language (in Code Boxes). | Python |
| movable | Element cannot manipulate with the mouse. | false, true |
| id | ID of element. | see section ID |
| class | Class of element. | see section Class |
| defineclass | Defines a class. | see section Class |
If you include a resource files to your presentation, e.g. an image, you can give the path to it relative to your presentation file. For example, you can make a directory in your project folder with the name images and put it there. In the application, you write then:
\image /images/myPicture.png
You can also gives full paths starting with /home/....
To change the default path of your resources you can type at the top of your potato file:
\setvar resourcepath myResourcePath.
The program automatically reloads your resources if you change them on your hard disk. Nevertheless, if you want to reload them, click Menu->Edit->Reload Resources.
Elements can have a class given by the argument class. Predefined classes are:
title, body, fullscreen, leftcolumn, rightcolumn
A class can specify a list of arguments which the element has by default, e.g. the position or the font-size. Nevertheless, arguments can also be given to an element and override the given by the class. Elements with a class can also be manipulated on the right panel. When using templates, elements with the same class on different slides can have different properties.
With the argument defineclass you can define the properties and position of an element as a new class and use it later on.
Have a look at the example:
\text[defineclass: myClass; color: green] Hello
\text[class: myClass] I am green.
Here the second element would have the color green and will be rendered at the same position as the first element.
To create a geometry use the command \geometry shape.
At the moment supported geometries are:
Every Box has an ID. The application saves the position and the ID of every Box. Usually, the box ID is generated by the application and contains the frame ID, the box type and class. If the ID is not unique, a counter is added. So, if you rename your frame or swap some boxes in the text file, the boxes’ geometry may change. You can define an ID to a Box with the argument id.
Implemented with C++ and the Qt5 Framework. Uses the KTextEditor, Antlr4 and the Breeze icons.
Formula support needs: LaTeX, dvisvgm.